Using Smart Cards for Remote Git Instances
Summary
While this feature is undocumented, it is possible to use a smart card to authenticate to a Git repository behind Mutual Transport Layer Security (mTLS). This product describes how to do this given a Gitea instance, a Yubikey PIV smart card and a GNU+Linux information system. The solution is to simply add the following to a users ~/.gitconfig file:
[http "https://git.example.com"]
        sslCert = "pkcs11:model=PKCS%2315%20emulated;manufacturer=piv_II;serial=0011223344556677;token=someUsername"
        sslKey = "pkcs11:model=PKCS%2315%20emulated;manufacturer=piv_II;serial=0011223344556677;token=someUsername"
        sslbackend = openssl
        sslkeytype = ENG
        sslcerttype = ENG
        sslCertPasswordProtected = true
Additionally, an authentication token must be generated for the user within Gitea (or equivalent). This is how a git pull looks like with this configuration:
$ git pull origin master
Password for 'cert:///pkcs11:model=PKCS%2315%20emulated;manufacturer=piv_II;serial=0011223344556677;token=someUsername':
Username for 'https://git.example.com': someUsername
Password for 'https://someUsername@git.example.com':
From https://git.example.com/someUsername/someRepository
 * branch            master     -> FETCH_HEAD
Already up to date.
Details
Background
Mutual TLS
In TLS, the client authenticates the server by verifying that the certificate has been cryptographically signed by a trusted certificate authority. Most commonly, this is seen when a user browses to a website. A lock icon appears next to their address bar if the server holds a proper certificate and associated private key; otherwise, an error occurs, and with the advent of HSTS, a user may be unable to browse to the website at all.
In mTLS, the server also requests the client to provide a client certificate, proving that it is signed by a certificate authority the server trusts. This is done at the protocol level, disavowing unauthorized users to even see the web app. It bears repeating: even if the server is running vCenter Server 7.0, vulnerable to CVE-2021-21985, an unauthenticated remote code execution (RCE) exploit, the attacker cannot exploit the server unless they have a private key and underlying certificate authorizing them to access vCenter.
Smart Cards
It is possible to simply hold a private key and certificate in an operating system's certificate store, allowing a signed-in user to use the certificate via a simple prompt. It's also possible to require the user to enter the encryption passphrase for the key, though in most environments, the user has the ability to turn this requirement off. Overall, one major issue remains: a password requirement for a private key used for mTLS is a form of single-factor authentication.
Enter NIST's FIPS 201-3, Personal Identify Verification (PIV) of Federal Employees and Contractors. Initially published in 2005, the standard defines a two-factor smart card, allowing an information system to request the user to enter an (up to) eight digit PIN before allowing the use of the private key and certificate. Yubikeys officially support PIV, and this will be the primary focus of this product.
System Configuration
Prerequisites
Ensure that the gnutls and openssl-pkcs11 packages are installed on your system. The former is used for p11tool, and the latter is used for cURL (the HTTP backend for git). For RHEL-based distros, use the following command to install:
sudo dnf install gnutls openssl-pkcs11 -yCreating .gitconfig
The .gitconfig requires the PKCS11 URI of the certificate and key. To get the URI, use p11tool, like so:
$ p11tool --list-all-certs
warning: no token URL was provided for this operation; the available tokens are:

pkcs11:model=p11-kit-trust;manufacturer=PKCS%2311%20Kit;serial=1;token=System%20Trust
pkcs11:model=p11-kit-trust;manufacturer=PKCS%2311%20Kit;serial=1;token=Default%20Trust
pkcs11:model=PKCS%2315%20emulated;manufacturer=piv_II;serial=0011223344556677;token=someUsername
In this case, the bottom-most line is our PIV device. This can be easily identified by the token value, which for Yubikeys is the subject name.
Create a new file, .gitconfig, in your home directory, containing the following data:
[http "https://git.example.com"]
        sslCert = "pkcs11:model=PKCS%2315%20emulated;manufacturer=piv_II;serial=0011223344556677;token=someUsername"
        sslKey = "pkcs11:model=PKCS%2315%20emulated;manufacturer=piv_II;serial=0011223344556677;token=someUsername"
        sslbackend = openssl
        sslkeytype = ENG
        sslcerttype = ENG
        sslCertPasswordProtected = true
The first line contains the URL for your Gitea (or equivalent) instance. Replace the values for sslCert and sslKey with your URI collected via the p11tool command above.
Gitea Configuration
These steps are specific to Gitea, but similar features are available for popular Git-based source code repository services like Bitbucket, GitLab, or GitHub Enterprise.
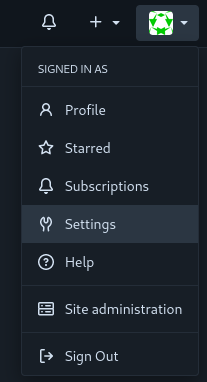
First, login and then press on your profile picture in the top right:

Select "Settings":
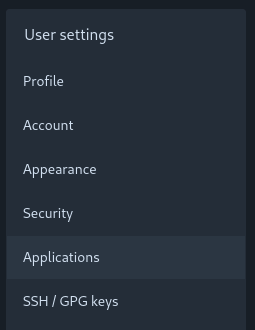
Then, select "Applications":
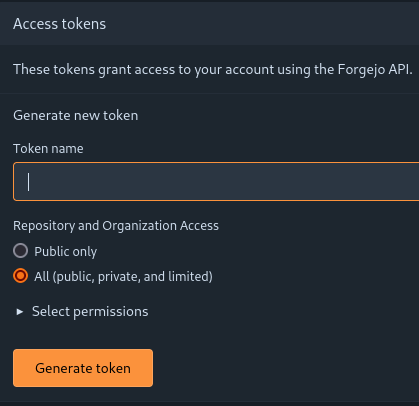
You will be brought to the following screen. Here, you can define a token with granular permissions. This token will be used after the mTLS authentication to the web server. The menu initially looks like so:
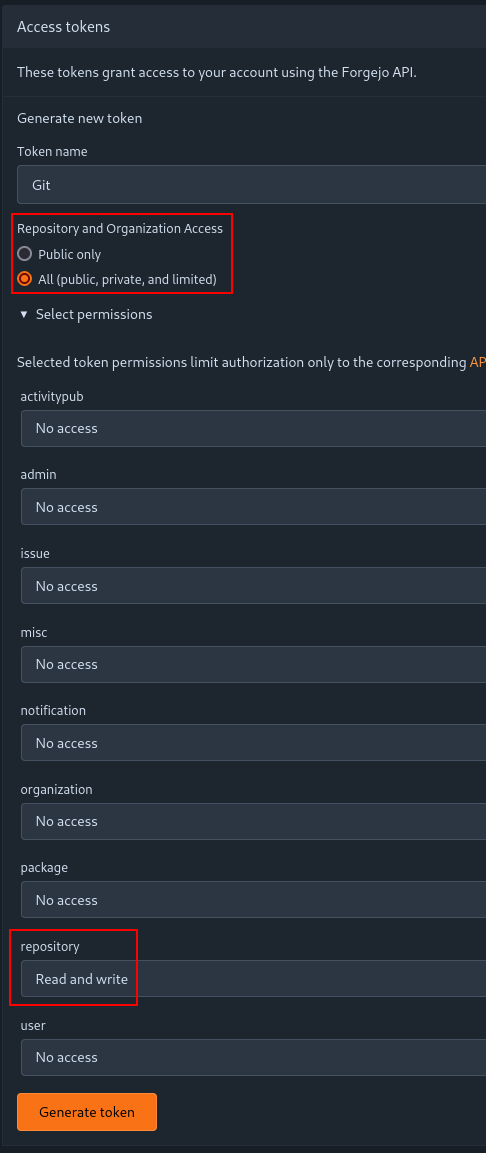
In our case, we set the token to have access to all public, private and limited repositories and organizations; and we allow read and write access to repositories:
Then, press "Generate token". You will be brought to the following screen, where the token secret is display:
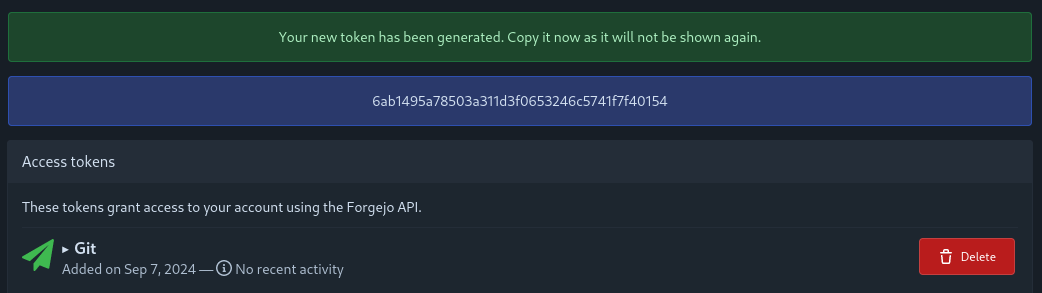
You must save this secret and use it every time you wish to do a Git operation on the remote instance
This is how a git pull looks like with this configuration:
$ git pull origin master
Password for 'cert:///pkcs11:model=PKCS%2315%20emulated;manufacturer=piv_II;serial=0011223344556677;token=someUsername':
Username for 'https://git.example.com': someUsername
Password for 'https://someUsername@git.example.com':
From https://git.example.com/someUsername/someRepository
 * branch            master     -> FETCH_HEAD
Already up to date.
Git will first prompt you for your PIV PIN. Then, it will prompt for the username and the token password.