Importing VMs from TrueNAS Core (Bhyve) to Proxmox
Summary
This page explains the process of importing VMs from TrueNAS Core, which uses FreeBSD's Bhyve for virtualization, to Proxmox.
Details
Proxmox
In Proxmox, create a new VM and note its VM number. When creating the VM, follow these guidelines:
In the OS section, select "Do not use any media"
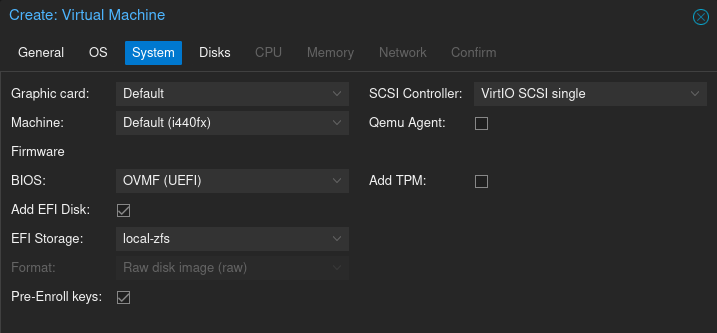
In the System section, select "OVMF (UEFI)" for BIOS. Also select EFI Storage to be the same dataset as where you would like your VM's disk to be. We chose the default local-zfs dataset, but you may choose any other dataset, such as an encrypted dataset if you want your VMs to be encrypted.
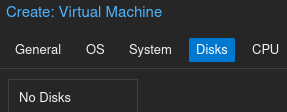
In the disk section, remove the default disk and do not set a disk.
Continue with the rest of the sections per your own personal requirements.
TrueNAS
Shutdown the VM in TrueNAS and make a snapshot of the VM dataset in TrueNAS. Login to SSH in TrueNAS as the root user and run the following command to send the dataset using SSH to Proxmox:
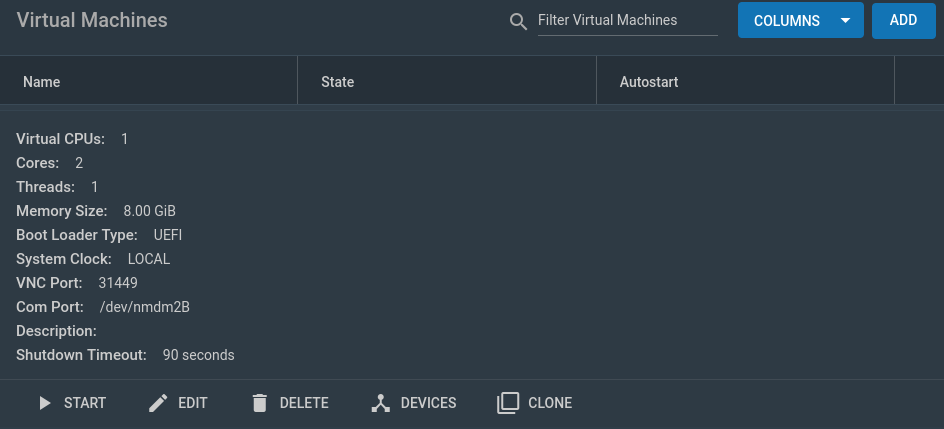
zfs send [VM_Dataset]@[snapshot_name] | ssh root@proxmox 'zfs receive rpool/[any dataset here]/vm-[num]-disk-1'If you use DHCP in your network and you would like your IP address for the VM to be identical after migration, press the devices button in your virtual machine menu:
Then, press the three dots over the "NIC" device and press Edit.
Back to Proxmox
Back in Proxmox, login to the root shell and run the qm rescan command. Then, go into your VM's hardware menu. The disk should show up as an unattached device. You may now attach it.
Congratulations, you have successfully migrated a virtual machine from TrueNAS Core to Proxmox!
Source Description Block
Multiple Sources:
https://forum.proxmox.com/threads/adding-existing-disk-from-storage-to-vm.108645/
https://www.youtube.com/watch?v=yKZ_JJaQHDk
Licensing
This page is licensed under a Creative Commons Universal (CC0 1.0) Public Domain Dedication.


